Making natural dreadlocks with Klixer®
Initial interview and planning
Dreadlocks, especially when they cover the whole head, involve a lot of work and a drastic change in looks and how hair feels. The Klixer® system has been developed to minimise these drawbacks, but before starting it is wise to make sure that the person who wants dreadlocks understands what is involved and is ready to go through with it.
It is important that he or she understands how the characteristics of his or her hair determine how easily dreadlocks will form: dry, curly hair will lock more easily than greasy, straight hair, etc.
In the interview agree on the desired look and on how to go about achieving it. Some questions that should be talked about include:
- Thick or thin dreadlocks?
- Rounded or open ends?
- Longer dreads using extensions?
- Any beads, ribbons, decoration etc.?
Sectioning hair
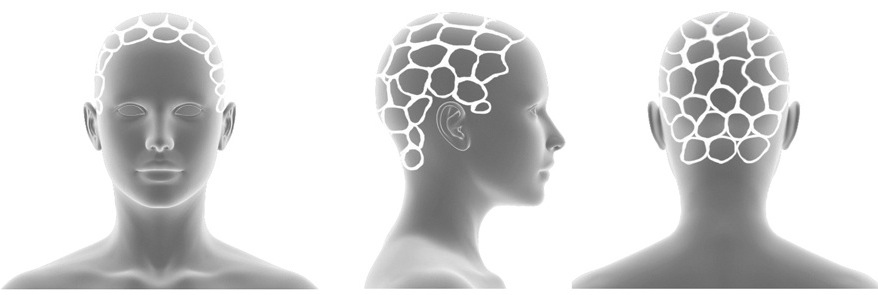
Once the desired dreadlock thickness has been decided on, the hair should be separated into sections. It is a good idea to start from the nape upwards and sidewards, finishing at the top front. Dreadlocks at the temples and on top may be slightly thinner than at the back. These areas are more sensitive and a thick section could pull too tightly at the edges.
It is best to create oval sections in a “honeycomb” pattern, not too uniform, so that they have a more natural look.
Prepairing hair
Once the hair has been sectioned the locks are matted to start the locking process. Remember that depending on how the hair is knotted the dreadlock will be shorter and thicker or longer and thinner.
Use one of the following techniques:
- Backcombing: comb the hair repeatedly towards the root until the hair is suitably tangled.
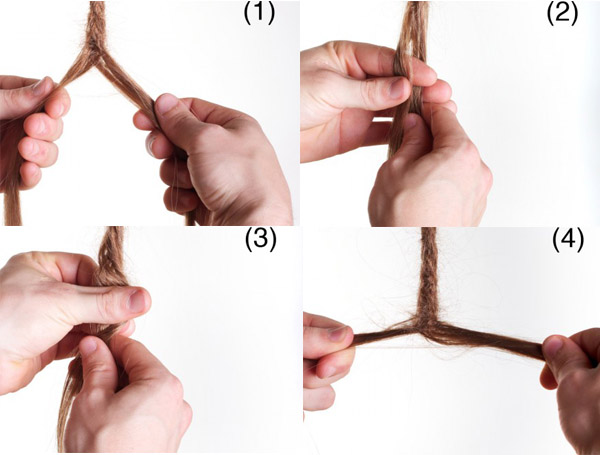
- Twist and rip: Rip the lock apart into two strands (1), cross them over (2) and twist the lock around rubbing it between the thumb and index finger to blend the two strands (3) before ripping apart again to pull the knots towards the scalp and start the process again (4).
Palm rolling
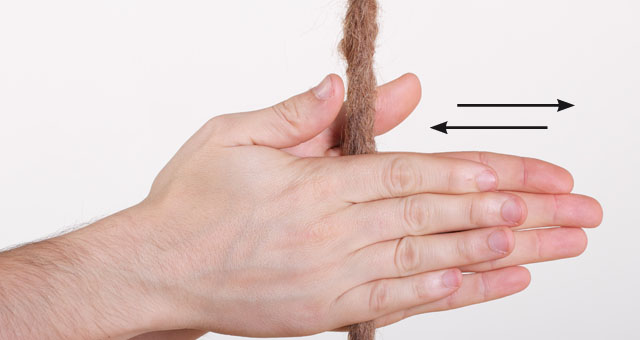
Take a previosuly knotted lock and roll it between your palms. Palm rolling is good for dreadlocks as it helps to keep them neat and round.
Tightening with Klixer®
After knotting and rolling, the lock looks quite similar to a dreadlock. However, with normal straight or wavy hair, this dreadlock will come undone by itself in the first wash. In order to avoid this and make the hairs lock, they must be woven togehter. The harpoon shape of the Klixer® needle takes care of this quickly and efficiently.
Just follow these steps:
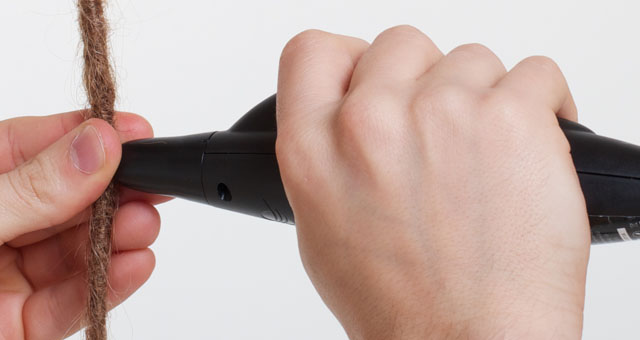
- Wrap any loose hairs around the lock. Use your thumb, index and middle fingers to hold one side of a rolled lock and apply the tip of the Klixer to the other side, in short bursts, whilst turning the lock with your fingers.
- Apply circular wrist movements to the device so that the Klixer tip can weave the whole thickness of the lock. Repeat the process along the length of the lock.
- Bear in mind that tightening is very quick and there is a risk of “tangling” the hair too much in certain places if the device is not constantly moved along the length of the lock. It is better to leave a loose area that can be tightened later than have a knot that does not look good and is hard work to undo.
Warning: Do not use Klixer® less than 2 centimetres from the root as this causes discomfort from tugging and there is a risk of pricking the scalp.
Depending on the amount, type and length of hair, this process could take between 4 and 8 minutes for each lock. The number of dreadlocks on a head commonly varies between 35 and 60.
Adding extensions
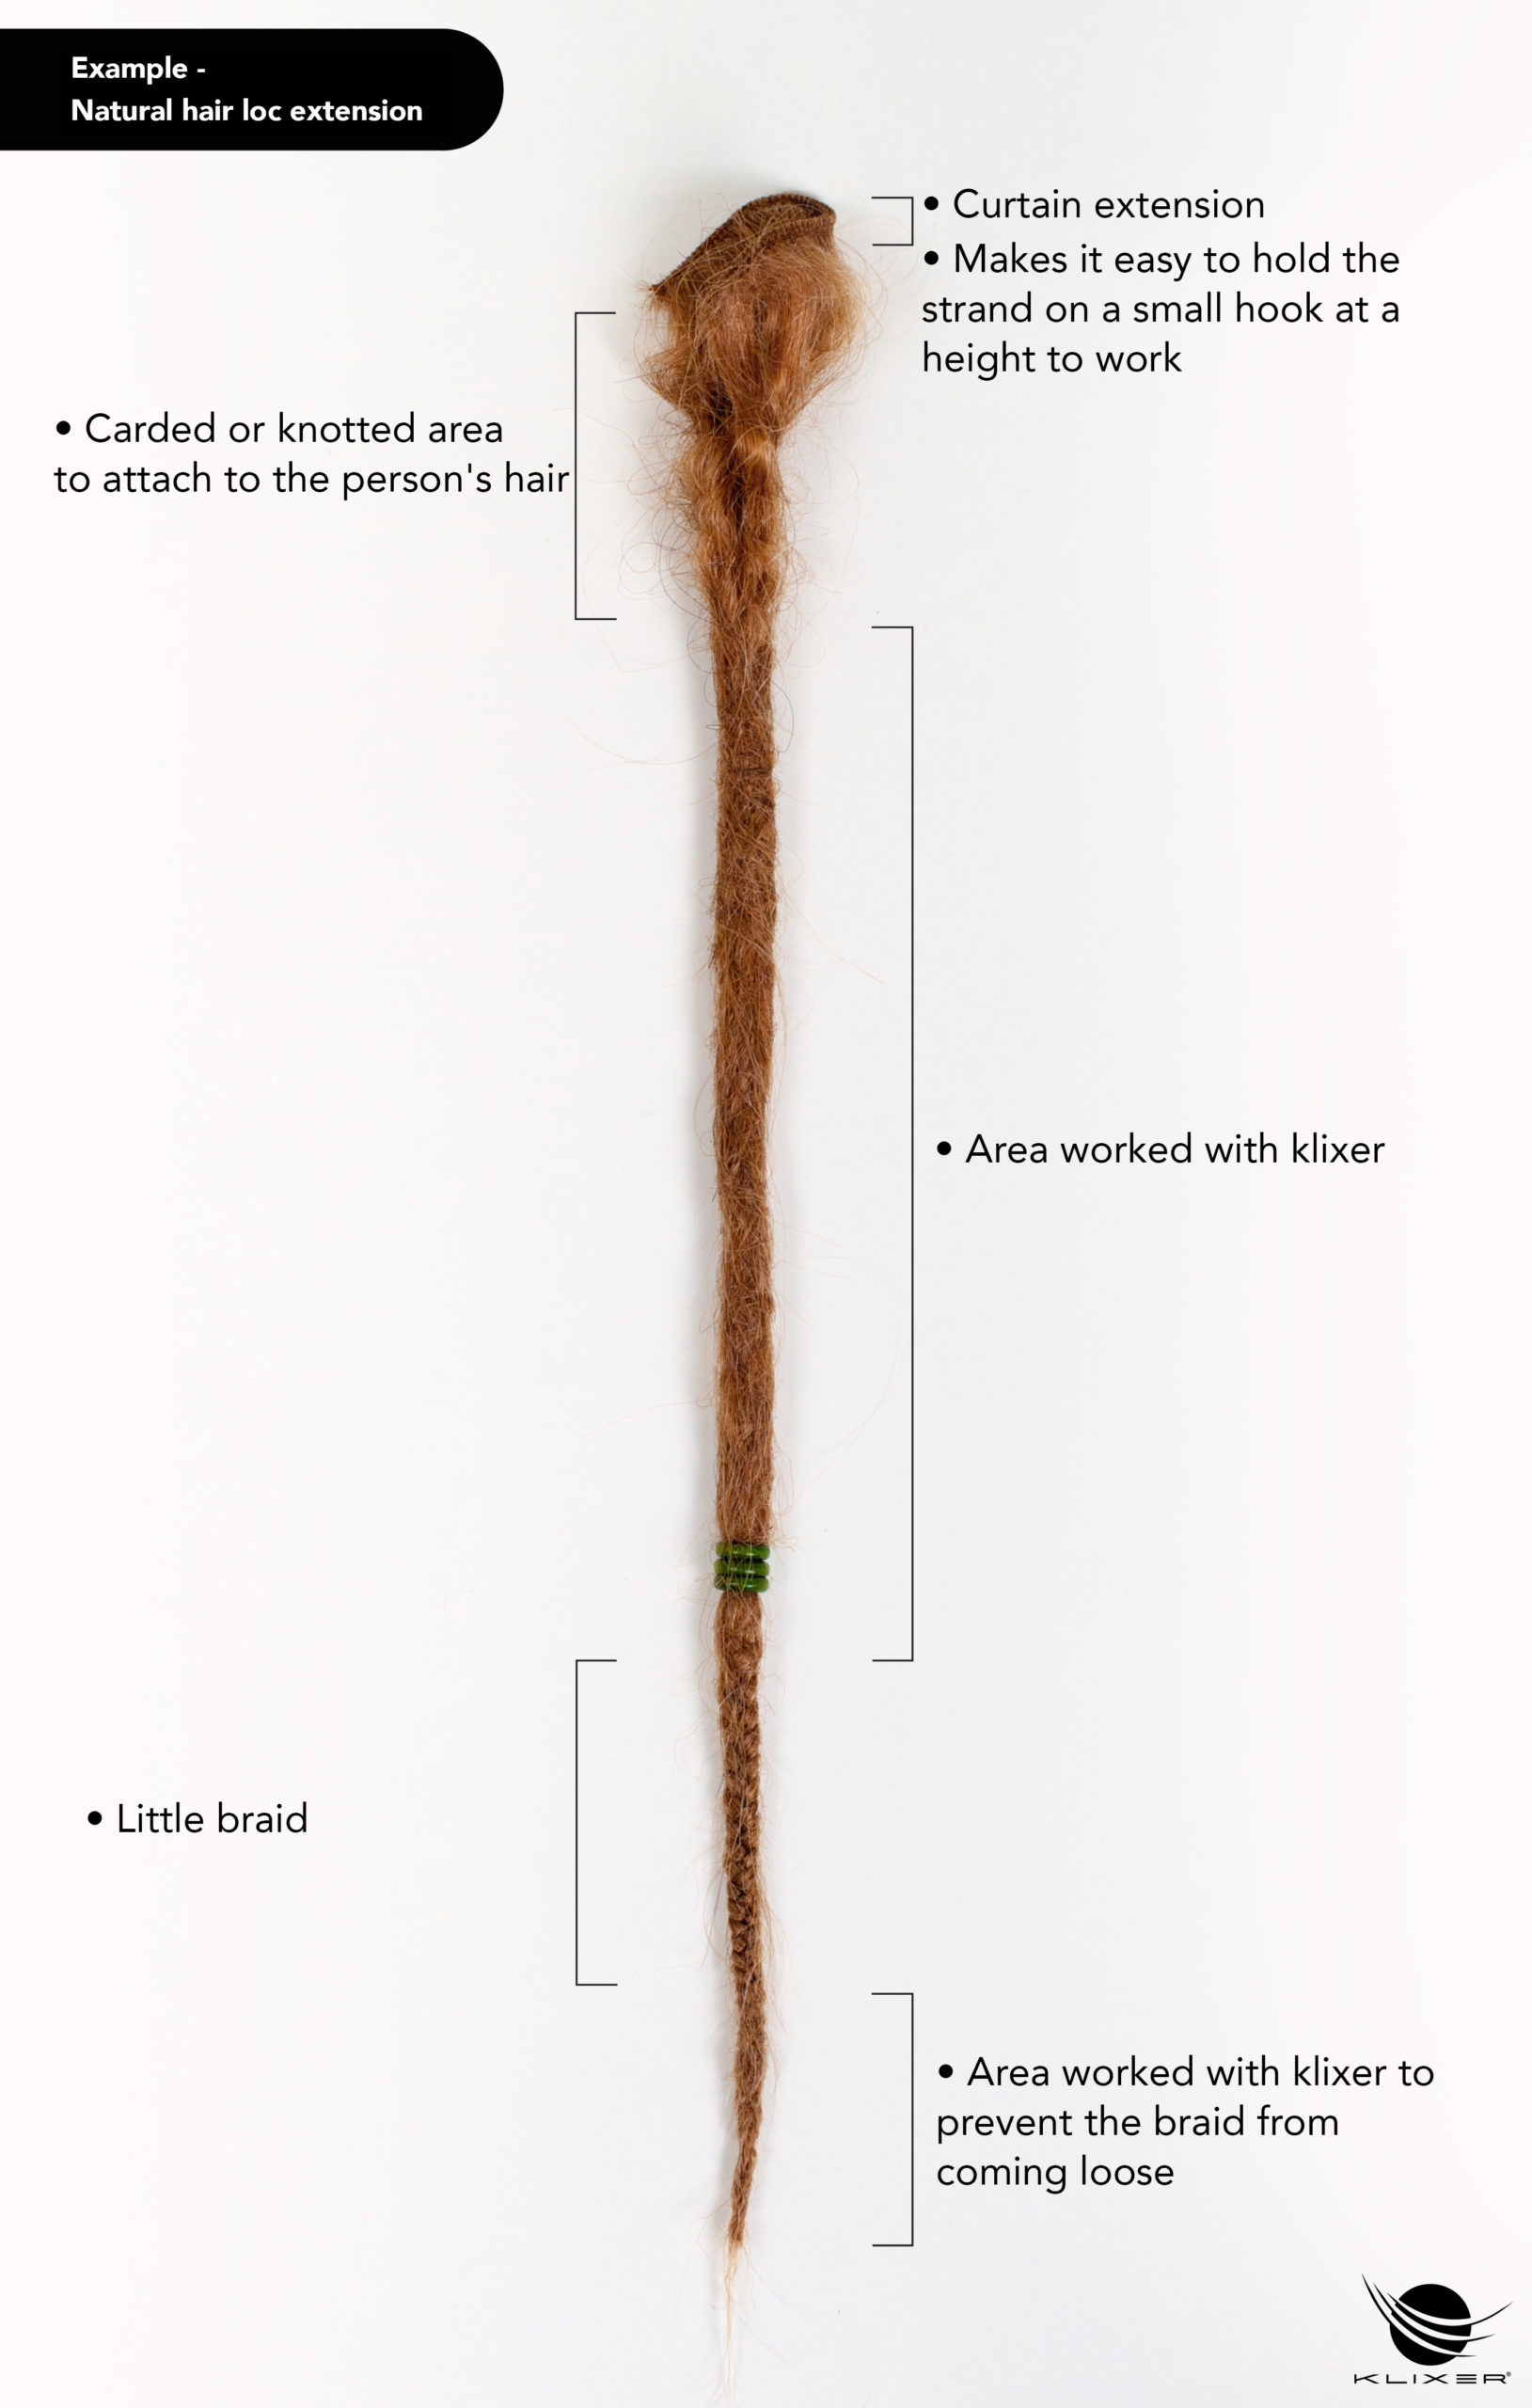
Klixer® can be used to attach natural or synthetic extensions without needing to use clips, fusion or bonding, blending them into hair seamlessly and indistinguishably. This makes it possible to have hair as long as desired from the start.
The process is as follows:
- Buy extensions in the desired colour, length, type, etc. There are plenty of specialist suppliers on the market that are easy to locate.
- Form dreadlocks from the hair extensions, following the steps in section “Getting Started”.
- Repeat the dreading process in the hair of the person who is to have extensions.
- Leave a 5-6 cm section of loose hair at the ends of the dreadlocks on the person’s head and at the start of the extensions.
- The loose sections at the end of the dreadlocks and the start of the extension are blended by hand. Any bump can be thinned out by taking hair from the extension.
- Compress the join by palm rolling. Any loose hairs should be wrapped around the join.
- Tighten up the join using Klixer® as you would on a normal dreadlock.
Dreadlocks are a radical change in hair structure which takes several months to mature before stabilising. Thanks to Klixer®, you can have mature look dreadlocks after the first session, but to help them to mature, you should follow some basic dreadcare guidelines.
In difficult areas, close to the root, for example, finishing may be carried out by hand with a crochet needle. For rounded ends, palm roll them first and then tighten them with the Klixer®
Grooming:
A grooming session should be carried out with Klixer® approximately one week after dreading. Check whether the dreadlocks are tight and palm roll those that have become loose and finish off the most conflictive areas.
It is best to carry out further grooming between four and six weeks later.


